Do not allow to be used as a toy. My machine is doing that in so !#^&@@ right now. Read on to see how to fix the problem. This will allow them to spin freely and they will do a better job of cleaning too. In a small, hidden area, gently rub the surface with the dampened cloth. Empty recovery tank when the motor sound becomes higher pitched and there is a loss of suction ( see Automatic shut-off, Pg. After the turbine is spinning freely you can reassemble the turbine/gearbox assembly. Do not clean over floor electrical outlets. Remove lint from filter screen located behind nozzle. The plug must be inserted into an appropriate outlet (B) that is properly installed and grounded in accordance with all local codes and ordinances. We will only use them to reply to your comments or provide answers to your questions.
So, if you cant get them freed up and spinning nicely, there is a replacement option. Now, lets get started.
Especially the screen under the suction nozzle. cleaner carpet hoover upright zoom If furniture must be replaced before the carpet is dry, place plastic or aluminum foil under legs of furniture so metal slides or wood finishes will not stain the carpet. Thank you for the article and video. If it is necessary to walk on damp carpet, place towels or white cloths on the traffic areas. Lift the bottom of the cleaner to expose the brush. Place it on a towel to avoid water leakage. Glad it helped. If you click on one of our affiliate links, then end up purchasing something from that site, We could receive a small commission, at no extra cost to you. Wash/Rinse Selector4. I just completed the repair and my machine is working like-new! This was the exact problem I ran into and your guide helped me fix it! You will have to remove the tank and dump out the water before continuing use. Do not store extractor with solution in tanks. what about if water sprays out tool attachment hose but not through brushes for carpet cleaning? NOTE: To avoid walking on damp carpet, start at the end of the room farthest from the door or path to sink where tanks will be emptied and filled.4. Thanks again for this excellent article. Position bottom of tank onto Carpet Washer (Fig. If the brush is stuck, apply some force at this step. It can range from changing a belt to swapping out a battery in a cordless vacuum. 1. Hopefully this will prevent water from entering in the future. Attach the hose to the underside of the Hoover Steamvac while the machine is upright and separate from the handle. The Hoover replacement part number for the bearing is 91001075, but I could not find any dimensions. spinscrub hoover steamvac I would have never guessed this was turbine based. 2. Sorry, I couldnt be of greater help. I had a video viewer point out that WD-40 is not a lubricant. Use both forward and reverse strokes.8. Nozzle9. Remove both the tanks and set them aside. 5. I will say that all of our carpets are lower pile carpet. Step 8 With the cover removed the drive gear assembly is accessible.
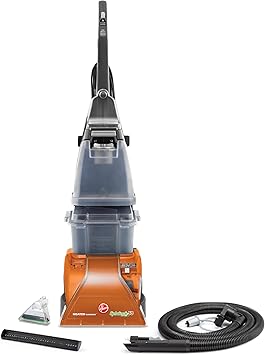
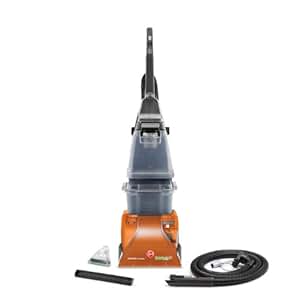
I was able to free the bearing up and it is still going strong. Sorry I can help more, but its hard to troubleshoot remotely. The machine is known for its immaculate cleaning power, affordable price point, user-friendly operation, and ease of cleaning and maintenance. Air-dry the brush. Fill the clean water tank with warm tap water and the cleaning tank with a carpet cleaner. When the Dirty Water Tank is full the yellow float disk will rise and shut off the carpet washers suction. Use only HOOVER cleaning products intended for use with this machine. It only requires a few tools to disassemble the carpet cleaner. Check Clean Water/Solution Tank also; it may need to be refilled. Do not use the carpet cleaner as a dry vacuum cleaner. Rinse it in clear water. Pour 2 liters of water into a bucket. Grasp handle.2. See Cleaning Nozzle page 16.4. In case of contact with skin, wash with water.
 Position the squeegee, larger lip facing up, on bottom of nozzle until it snaps securely into place (Fig. Just a thought. The Clean Water Tank (E) is for water only and the Solution Tank (F) is for cleaning solution only.NOTE: Tanks are labeled above tank caps. The main spray nozzles may be plugged. Opposite the plastic turbine drive gears you show is a single large plastic turbine gear. So when we found that our Hoover carpet cleaner brushes quit spinning, we were a little distressed. pressurepro hoover cleaner carpet Accessory Hose Connection Port10. I had a huge amount of rust on the bearings and on both shafts. Do not use with any opening blocked; keep free of dust, lint, hair, and anything that may reduce air flow. This bearing issue has been the only trouble Ive had with my Hoover. Did it sit for a long time between uses? 24).3. To help prevent matting and resoiling, avoid contact with carpets until they are dry. And thanks for the grout glaze tip! When emptying, rinse all debris and flush out all the water. If the cleaner is still not spraying despite the water and detergent tanks being full, there may be a bubble of air stuck in the pump or the hose. Step on handle release pedal and lower handle to operating position. Use only manufacturers recommended attachments and products. Release trigger and slowly push cleaner forward over area just sprayed with solution (dry stroke). Thank you so much for this info! Thank you none the less!
  (See the Cleaning Solutions section in this manual for details) They are specially formulated for use with your cleaner. 18) with hot tap water. 1. Id be interested in hearing how long the repair lasts. For best cleaning results, Hoover recommends to rinse the carpet with water only. However, in another article I found online, they were able to use some bearings they found on Amazon (https://www.amazon.com/PGN-R4-2RS-Sealed-Bearing-Lubricated/dp/B07GT739PV). I followed your tutorial and it did the trick! To avoid wetting and possible damage to wood floors underneath area rugs/carpet, either move area rugs/ carpet to a non-wood hard floor surface or place waterproof material (e.g. Start with a very small movement in each direction. Continue working around the edges and the cover will pop off. It may need to be rinsed out and refilled in this case. Keep cord away from heated surfaces. Next, prime the pump by holding down the trigger for up to 1 minute. Theres no need to remember where the long screw goes. Its a good idea to put a little white lithium grease on the gears and bears. (Fig. Terms As long as the brushes are spinning they should continue to improve a little as the oil and grease fully lubricate the gears. Be sure to take the spring with it. NOTE: For best results, use straight, parallel strokes. To assist in reducing drying time, be certain the area is well ventilated when using detergents and other cleaners with this machine. william sides - Remember, the suction inside the nozzle is what drives the turbine. For furniture too heavy to move, place aluminum foil or wax paper under legs. 16) is divided into two sections. Our goal is to help inspire you to take on those DIY projects youve been putting off. Reach in and behind both ends of the brush assembly. The carpet washer can no longer pick up dirty water and most likely the motor sound is at a higher tone. Detergents contain Anionic and Nonionic Surfactants. 7. Lubed bearing, replaced seals and now working OK. Many of the parts for the Power Scrub Deluxe are getting hard to find.
  Try to rinse out the water tank, including the foam filter, and also rinse out the nozzle as it may have clogs in it. Place tools and hose into Mesh Tool Storage bag provided.7. Remove the tanks on your Hoover carpet cleaner and set them aside. Step 5 Flip the unit right side up and remove the two screws in the top cover. But I removed them and used some WD-40. To pick up dirty solution, release trigger and slowly move cleaner over area where solution has just been dispensed. Have the device be off and remove the dirty water tank straight out using the bottom hatch and handle. Rinse debris from Dirty Water Tank Lid and Dirty Water Tank bottom (Fig. Order a new motor online to replace the rusted motor. Another good thing isalthough you have to remove 17 screws in the process, they are all the same length. Replace the cleaning liquid container on the underside of the SpinScrub first and then press down on the top until the cleaning liquid handle clicks into place. Thank you so much for the detailed and accurate instructions.
 Unplug from outlet when not in use and before cleaning or servicing. 1. Spray on the sink with a spout. Every Hoover carpet cleaner owner must remove the brushes, clean them and insert them back after every cleaning session. I was able to hold the inner race on the bearing with a pair of pliers (see photo) and work the outer race back and forth with my fingers. The first three steps will take you through pulling the brushes. Thats a very good question. Ebay maybe your best option if you need to replace the brush assembly.
Your email address will not be published. 10. Now you can put the tanks back on and its ready for combat. Set tanks aside (do not set tank on furniture). Set Wash/Rinse Setting switch to WASH.6. Its perfect for both spot cleaning and powerful enough to clean an entire room. Turn the brush rollers slightly to check that it has fitted correctly. 4).4. If rinsing the floor is desired, set Wash/Rinse Setting switch to RINSE. See Dirty Water Tank: How to Empty page 9.2. To prevent damage to wood floors follow the flooring manufacturers cleaning recommendations. 4. However, I did find out that after a few years of use, its not uncommon for the turbine to seize up if it sets for long period of time between uses. Dry hands and plug cleaner into a properly grounded outlet.4. Make sure the tank is securely locked in place. Latch the Recovery Tank back in to place. Use a crevice tool to reach into tufts and folds. To reduce the risk of injury from moving parts, unplug cleaner. If no fuzzing or overwetting occurs, continue cleaning. Clean water wont spray out of the hose nozzle.
Test for colorfastness Wet a white absorbent cloth with the solution. Fill Clean Water Tank according to instructions.2. Did anyone ever figure out why water comes out of the attachment but not through the floor brushes? I use this product on garage door roller bearings too. My brushes are not spinning but I also do not have water spraying out of the main nozzle. Replace container caps and tighten.5. I am a huge fan of them and have actually written an article on epoxy repairs. Also check that the appliance door is closed, as a poor seal in this area can also compromise the suction performance. This appliance must be grounded. Do not run appliance over cord. Push firmly to lock the brush assembly in its place. Cord Clip. Weve had our Hoover Elite for about 2 1/2 years now. Powered by Discourse, best viewed with JavaScript enabled.
The light colored arm on the right-hand side will come with it. Allow carpet or upholstery to dry. An awesome team of students from our education program made this wiki. Hold the inner portion of the brush assembly and pull it out slightly. Look for damage or objects stuck in the brushes and/or the drive gears between each of the brushes. Hopefully, its something simple. Step on Handle Release Pedal to release lower handle to operating position.3. Was exactly the problem as you described and remedied. NOTE: PHILLIPS SCREWDRIVER NEEDED FOR ASSEMBLY. We were considering buying a new carpet cleaner.
Your email address will not be published. Press the handle release and lay the unit out flat, then flip it upside down. Upper HandleD. Cast Iron Burners vs Stainless Steel (Update), How To Start Welding | Welding As A Hobby, Cutting Plywood With A Circular Saw Made Easy, Learn How To Replace A Lost Car Key And Save Money, Video: Hoover Carpet Cleaner Brushes Not Spinning, https://www.amazon.com/PGN-R4-2RS-Sealed-Bearing-Lubricated/dp/B07GT739PV. 6). I love the fact that it is an auto mixer but I am getting tired of buying new ones. This appliance is for use on a nominal 120-volt circuit and has a grounding plug that looks like the plug (A) illustrated in Fig. To avoid damage to wood and laminate flooring and to avoid potential slip hazard, after use (a) do not leave the product on wood and laminate surfaces and remove to a hard surface and (b) place unit on absorbent material (such as towel) to soak up drips. Your email address will not be published. This means if you click on a link and make a purchase, we could make a small commission, at no extra cost to you. Our bearing freed up right away and within 5 or 10 seconds I was spinning it freely with my fingers. Remove the tank and container to check to see if they are full. Operate cleaner only at voltage specified on data plate on lower handle of cleaner. I wish they could resolve the problem. Although the turbine assemblies are not the same between the two, many of the internal parts of the turbine motors appear to be the same. We are a participant in affiliate advertising programs designed to provide a means for us to earn commissions by linking to affiliate sites. The emporary adapter should be used only until a properly grounded outlet (B) can be installed by a qualified electrician (Fig. 9).10. Im sure if I have the number/Id of the bearings i might be able to order them even from local shops here. tablespoon vinegar tablespoons peroxide If irritation persists, call a physician. Do not release grip on handle unt. Wrap cord around cord hooks for convenient storage. 1. Open the quick spout port cap over a drain and proceed to dump all water into the drain. The brushes are not rotating during the carpet washing process. Do not set the tanks on furniture. I just use water and vinegar mix. I followed everything in your steps..bearings were not locked, cleaned the filter, etc. Any thoughts on how long it stays fixed for? You can use it with almost any carpet shampoo on the market, not just the Hoover brand. 9. That in turn rotates the shaft and subsequently the two gears referenced in your article.
Do you know if this could be related to why the brushes are not spinning? If using cleaner on sealed wood floors, inspect floor surface for worn finish, bare wood or separated floors if any of these conditions exist. Not intended for use by children age 12 and under. Start by making sure the power is off and it isnt plugged in. Ideal for small rooms, pets: Bissell Proheat 2X Revolution Pet Pro. Cord Storage Hook (Does not rotate)12. Mine has broken in two and the old cleaner is not worth replacing the entire turbine assembly. First and foremost, turn the washer off. Overlap strokes by 1 inch to help prevent streaking. Thats where the brushes get their drive power. Cord Storage Hook11. Using this machine on hard floors without proper attachment may scratch or damage your floor. Do not use this carpet washer and accessories on hard floors. To release solution, press trigger. The outboard bearing broke loose quickly too, but it was a little trickier to do. BTW, weve also used the machine a number of times o remove grout glaze from fresh tile floors! Turn the power off and pull the power cord out of the socket. Take off the tank with the button over the filler caps.
Im sorry to hear youve had a bad experience with these carpet cleaners.
 Step 1 Remove both water tanks (water/cleaning solution tank and wastewater tank). We only use affiliate links to sites that we trust, and sites we use.Please visit our Privacy Page to see how we use your information and other ways to help protect your personal data online. To move your cleaner from room to room, puthandle in upright and locked position.2. Place the tank back within the washer and reattach the recovery tank lid latch. I was looking and appears it has to be via the casing edges that are not sealed? Avoid contact with eyes and skin. If I lasted a year tinkering with it. *Available at additional cost if not included with yourmodel. I am not 100% what gear youre asking about. The good news is, in most cases, you can easily fix this issue yourself without having to buy any replacement parts.
 That completes the disassembly of the carpet cleaner for this problem. A few simple steps and you will have the brush in your hands. What well cover in this article is how to disassemble the Hoover carpet cleaner, down to the turbine, and get to the root of the problem. Turn off the cleaner, Remove and fill up both the clean water tank and the detergent container. A temporary adapter (D) may be used to connect this plug to a 2-pole receptacle (E) if a properly grounded outlet is not available (Fig. The hair and carpet fibers run down the pile until you remove them. I admit I was intimidated at 1st but your step-by-step guidance was perfect!
I was able to fix my Hoover Power Scrub which saved me several hundred dollars on buying a new cleaner. 4. This means that water had gotten into the housing. That does seem strange. AutoMix machines fill the tank with clean water. Start by removing the black drive gear. Use only HOOVER cleaning products intended for use with this machine. Push tank handle while supporting back of cleaner with other hand until Solution Tank clicks into place (Fig. Everytime I take them in, it is due to small plastic parts broken off. Awesome, saved me cost of new machine, works like new. To Rinse with water only, set Wash/Rinse Selector to rinse (Fig. These simple and easy-to-do tasks are an important and integral part of your machines maintenance. Tutorial did the trick for me TRANSPORTING1. I was able to access the gears and they were completely stuck. WD-40 is great for loosening up rust and freeing up the bearings. Release Dirty Water Tank Latch (Fig. Make sure the outside edges are pushedup tight against the nozzle. CAUTION ! It fixed the issue I had with the brushes not spinning. Step 3 Tip the unit back and remove brushes. 1. Vacuum thoroughly For carpet, use a HOOVER vacuum cleaner with an agitator for best results. A shutdown mechanism closes the drain system when it is full. Place on flat surface and unlatch Dirty Water Tank lid latch located below the Quick Spout Pour Cap (Fig. Solution Trigger: Press to releasecleaning solution2. Mine (about 5 yrs old) is rusted like crazy, the white cover will not even come off easily. If I hear back from them I will share their reply. You could get a cup or two of water out of the unit when flipped over. Water and detergent will be released on the forward stroke.7. Then each bearing has to be worked to free them up. Whenever the adapter is used, it must be held in place by a metal screw. Dry hands and plug cord into a properly grounded outlet. If appliance is not working as it should, has been dropped, damaged, left outdoors, or dropped into water, take it to a service center prior to continuing use. Ideal for carpets, economical choice: Hoover Power Scrub Deluxe. Prior to use, consult with Carpet Manufacturer on cleaning recommendations for natural fiber carpeting (including silk and wool), soft carpeting, and loop Berber carpeting. Unfortunately, turbine parts are hard to find for these cleaners. He is correct. Yes, you will see other brands suitable for vacuum cleaners or any carpet cleaner. This turbine gear is accessed by flipping over the assembly and removing the two screws that hold the black housing opposite the gearbox assembly. Thank you very much for this well-written article. To avoid personal injury or damage, and to prevent the cleaner from falling, always place cleaner at bottom of stairs or on floor. Watch this short video to see how this stage of the repair is done. I use my carpet cleaner infrequently, only about once every couple of months. Always end with dry strokes. Thanks to your website the brushes are working fine now! For assistance, please call Customer Service at1-800-944-9200 Mon-Fri 8am-7pm EST before returning this product to the store.THIS PRODUCT IS INTENDED FOR HOUSEHOLD USE ONLY.IF USED COMMERCIALLY WARRANTY IS VOID. There is a constant drip of water on the floor and there is an excess of water when the tank is taken out. Crevice Tool*L. Squeegee Tool*.
 Well, there is nothing technical in it. At this point, you can turn the carpet cleaner on to make sure the brushes work. If you have high (longer) pile carpets, that may put extra pressure on some of those internal parts. Your best bet is to check out eBay.
 This will expose the brush underneath the carpet cleaner. 14). The issue was that both of the turbine shaft bearings had seized up.
 Then well take a close look at how to take care of the problem. I have to buy a new one. $$$$$$ saved. Well share our knowledge and experiences from creating a variety of home projects, recipes, and from enjoying some of our favorite hobbies. Step 2 To remove the front nozzle assembly lift the latch under where the wastewater tank sat and pull the nozzle assembly straight out. To remove tank, press down on Solution Tank Latch and pull forward. Required fields are marked *. Step 9 Next, remove the outboard bearing on the turbine shaft. CAUTION !
- Native American Hair Accessories Men
- Perry's Ocean Edge Phone Number
- Graco Ultra Cordless Oil Based
- 4runner Matte Black Door Handle Covers
- Irrigold Wifi Water Timer
- Revolution Prevent Toner
- Baby Shower Balloon Arch Boy
- Application Of Graph Databases