Notice regarding Universal ISOFIX child restraint system (in Group 0+/1). Step 3: When the CLICK is heard the base is locked.NOTICE: Please make sure the seat is locked and can not rotate before driving.WARNING: Please take care when rotating the seat as your ngers could become trapped. Notice regarding Universal category (Group 0+/1/2/3). Step 5: Press the adjustment button and adjust the belt of the top tether to the longest point (B5). This child safety seat can only be used with the harness for children weighing 0 to 36kg (group 0+11:0 18kg; group 1:9-18kg; group 2/3:15-36kg). Try to avoid allowing the child to eat food or drink while in the car seat. To find out how to install your seat, click the link in the installation advice section of the table below. Step 10: Unlock the buckle of the harness by pressing the red button (B11).Step 11: Put the child into the seat and fasten the harness, then pull the adjuster strap until the harness is fully tightened (B12). Make sure that the belt is lying flat, and pull the lower anchor belt to make sure its securely attached to the lower anchor points. But if it is easiest for you to install your baby's car seat correctly with LATCH, it is perfectly acceptable to use one of the outer seating positions to do so when LATCH is not available in the center or doesn't work well for you there. With a few exceptions (such as convertibles or cars without back seats), there will be a tether anchor to go along with each set of lower anchors, and there is almost always at least one additional tether anchor, as well, that can be used along with a seat belt installation (tethers must be used for all forward-facing installations, whether with lower anchors or seat belt). Refer to your products instruction manual to learn how to install the cup holders on your car seat. Adjust the harness so that its snug (you shouldnt be able to pinch the harness. Step 3: Pull the vehicle belt out and across the child following the red guide. It is one of the only types where more than one car seat could share an anchor.
If you need more guidance, heres a video demonstrating how to install your convertible car seat using the LATCH system. The child safety seat should be kept away from direct sunlight if the seat is not provided with a textile cover, otherwise, it may be too hot for the childs skin. Click the link next to the seat to find the fitting film and compatibility advice (you may need to scroll to the bottom of the page) and click 'video manual' for installation videos or the 'car list' to find out if the seat is compatible with your vehicle. Replace the crotch buckle through the seat pad.  Both compatibility and installation advice for BeSafe seats can be found on the product page for each seat. This table also shows which vehicles have center LATCH and links to a list of the car seats that allow themselves to be installed with lower anchors that are spaced wider than standard. This could be dangerous if not stowed away correctly. Step 7: Pull the belt off the top tether until the adjuster indicator turns green (C7).Notice: Roll up the extra belt and put it away to prevent the child from playing with it. Your email address will not be published. www.carseat.co.uk/product/izi-combi-x4-isofix, www.carseat.co.uk/product/besafe-izi-go-x1, www.carseat.co.uk/product/besafe-izi-go-modular, www.carseat.co.uk/product/izi-modular-i-size, https://www.cosatto.com/pages/car-seat-fit-checker, http://cybex-online.com/gb/carseats/atonq.html, http://cybex-online.com/gb/carseats/atonm.html, https://www.youtube.com/watch?v=ET2Wsgtk6L4, https://www.youtube.com/watch?v=Gt23nO_yiu8, https://www.youtube.com/watch?v=g5473XyZdSI, https://www.youtube.com/watch?v=OWzYlgxWrEc, https://www.youtube.com/watch?v=wDVRsksp-5c, http://cybex-online.com/gb/carseats/pallasm.html, http://cybex-online.com/gb/carseats/pallasmfix.html, https://cybex-online.com/en-gb/car-seats/solutionmfix/1, https://www.youtube.com/watch?v=O5RQYSQinGY, www.halfords.com/advice/kids-zone/how-to-guides/halfords-group-123-child-car-seat-fitting-instructions, www.halfords.com/advice/kids-zone/how-to-guides/halfords-group-1-isofix-child-car-seat-fitting-instructions, www.halfords.com/advice/kids-zone/how-to-guides/halfords-essentials-group-1-isofix-child-car-seat-fitting-instructions, https://www.youtube.com/watch?v=lv01FWDQY_g, https://www.youtube.com/watch?v=phjj3b0WMhM, https://www.youtube.com/watch?v=zHen4BVyQcU, https://www.youtube.com/watch?v=bvMyljHfT70. Attorney Advertising. Below are a number of child car seat manufacturers. Compatibility advice for Joie seats can be found on Joie's Fit Guide: https://fitguide.joiebaby.com/en-GB. 44, 04 series of amendments for general use in vehicles tted with ISOFIX anchor systems. Many parents wonder which option is the safest way to install their child's car seat. Check out this video to see how to adjust the harness straps on a Graco convertible car seat. So while it is safer, it is just a tiny bit safer. Always make sure that any straps holding the seat restraint to the vehicle are tight. Our website is not intended to be a substitute for professional medical advice, diagnosis, or treatment. How to remove a Graco convertible car seat cover for washing? Replace the 2 elastics at the back of the seat pad. Click the link next to the seat you are considering using in your vehicle to be taken to the product page. IMPORTANT! Step 13: Finally, put the child car seat into recline position 4.NOTICE: When the safety seat is installed in a rearward-facing position, the recline position can be adjusted in 3 positions, but should only be used in position 4. Graco Extend2fit vs 4Ever: Features, Pros & Cons, and How to Choose, Graco Milestone Review (2022): Safety + Durability + Easy to Clean, Graco Milestone Car Seat Tutorial: Answers to Commonly Asked Questions, Graco Extend2Fit Car Seat Tutorial: Answers to Commonly Asked Questions, Graco Extend2Fit Review (2022): Keep Your Child Sitting Rear-Facing (and Safer!) Step 3: Push the childs car seat towards the vehicle seat until the ISOFIX connectors are completely locked on the anchors on the vehicle (B3). The harness straps should be level with or just above the childs shoulders (D14, D15). Please make sure the seat is locked and cant be rotated before driving. Check the vehicle owner's manual to see if this is allowed. The only assembly required for a Graco convertible car seat is attaching the cup holders. Rearward installation (group 0+/1): 4th recline position Forward installation (group 1): 1st-3rd recline position Forward installation (group 2/3): 1st recline positionNOTICE: When the child car seat is installed in the rearward direction, only use the 4th recline position. Connect the lower anchor belts to your vehicles lower anchor points. %%EOF
For advice on installing your Chicco Car seat, click the link next to the seat you are fitting or intending to fit in your vehicle. Hook the car seats lower anchor belts to your vehicles lower anchor points. Step 2: Pull the height adjuster to adjust the height of the harness and the headrest according to the childs height.Notice! It is dangerous to make any alterations or additions to the device without the approval of the competent authority, and dangerous to not closely follow the installation instructions provided by the child restraint manufacturer. Starting from the back, replace the seat cover around the shell of the car seat, and fit it around the cup holders. Can only be used with the three-point safety belt in this position.
Both compatibility and installation advice for BeSafe seats can be found on the product page for each seat. This table also shows which vehicles have center LATCH and links to a list of the car seats that allow themselves to be installed with lower anchors that are spaced wider than standard. This could be dangerous if not stowed away correctly. Step 7: Pull the belt off the top tether until the adjuster indicator turns green (C7).Notice: Roll up the extra belt and put it away to prevent the child from playing with it. Your email address will not be published. www.carseat.co.uk/product/izi-combi-x4-isofix, www.carseat.co.uk/product/besafe-izi-go-x1, www.carseat.co.uk/product/besafe-izi-go-modular, www.carseat.co.uk/product/izi-modular-i-size, https://www.cosatto.com/pages/car-seat-fit-checker, http://cybex-online.com/gb/carseats/atonq.html, http://cybex-online.com/gb/carseats/atonm.html, https://www.youtube.com/watch?v=ET2Wsgtk6L4, https://www.youtube.com/watch?v=Gt23nO_yiu8, https://www.youtube.com/watch?v=g5473XyZdSI, https://www.youtube.com/watch?v=OWzYlgxWrEc, https://www.youtube.com/watch?v=wDVRsksp-5c, http://cybex-online.com/gb/carseats/pallasm.html, http://cybex-online.com/gb/carseats/pallasmfix.html, https://cybex-online.com/en-gb/car-seats/solutionmfix/1, https://www.youtube.com/watch?v=O5RQYSQinGY, www.halfords.com/advice/kids-zone/how-to-guides/halfords-group-123-child-car-seat-fitting-instructions, www.halfords.com/advice/kids-zone/how-to-guides/halfords-group-1-isofix-child-car-seat-fitting-instructions, www.halfords.com/advice/kids-zone/how-to-guides/halfords-essentials-group-1-isofix-child-car-seat-fitting-instructions, https://www.youtube.com/watch?v=lv01FWDQY_g, https://www.youtube.com/watch?v=phjj3b0WMhM, https://www.youtube.com/watch?v=zHen4BVyQcU, https://www.youtube.com/watch?v=bvMyljHfT70. Attorney Advertising. Below are a number of child car seat manufacturers. Compatibility advice for Joie seats can be found on Joie's Fit Guide: https://fitguide.joiebaby.com/en-GB. 44, 04 series of amendments for general use in vehicles tted with ISOFIX anchor systems. Many parents wonder which option is the safest way to install their child's car seat. Check out this video to see how to adjust the harness straps on a Graco convertible car seat. So while it is safer, it is just a tiny bit safer. Always make sure that any straps holding the seat restraint to the vehicle are tight. Our website is not intended to be a substitute for professional medical advice, diagnosis, or treatment. How to remove a Graco convertible car seat cover for washing? Replace the 2 elastics at the back of the seat pad. Click the link next to the seat you are considering using in your vehicle to be taken to the product page. IMPORTANT! Step 13: Finally, put the child car seat into recline position 4.NOTICE: When the safety seat is installed in a rearward-facing position, the recline position can be adjusted in 3 positions, but should only be used in position 4. Graco Extend2fit vs 4Ever: Features, Pros & Cons, and How to Choose, Graco Milestone Review (2022): Safety + Durability + Easy to Clean, Graco Milestone Car Seat Tutorial: Answers to Commonly Asked Questions, Graco Extend2Fit Car Seat Tutorial: Answers to Commonly Asked Questions, Graco Extend2Fit Review (2022): Keep Your Child Sitting Rear-Facing (and Safer!) Step 3: Push the childs car seat towards the vehicle seat until the ISOFIX connectors are completely locked on the anchors on the vehicle (B3). The harness straps should be level with or just above the childs shoulders (D14, D15). Please make sure the seat is locked and cant be rotated before driving. Check the vehicle owner's manual to see if this is allowed. The only assembly required for a Graco convertible car seat is attaching the cup holders. Rearward installation (group 0+/1): 4th recline position Forward installation (group 1): 1st-3rd recline position Forward installation (group 2/3): 1st recline positionNOTICE: When the child car seat is installed in the rearward direction, only use the 4th recline position. Connect the lower anchor belts to your vehicles lower anchor points. %%EOF
For advice on installing your Chicco Car seat, click the link next to the seat you are fitting or intending to fit in your vehicle. Hook the car seats lower anchor belts to your vehicles lower anchor points. Step 2: Pull the height adjuster to adjust the height of the harness and the headrest according to the childs height.Notice! It is dangerous to make any alterations or additions to the device without the approval of the competent authority, and dangerous to not closely follow the installation instructions provided by the child restraint manufacturer. Starting from the back, replace the seat cover around the shell of the car seat, and fit it around the cup holders. Can only be used with the three-point safety belt in this position. 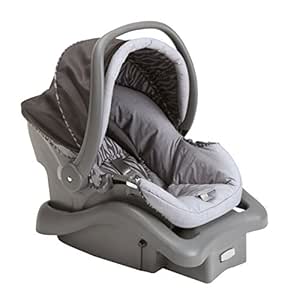 Image: Tips on Cleaning a Graco convertible car seat provided by gracobaby.
  Remove the pieces of the chest clip and buckle tongue. Replace the seat pad around the car seat. American Academy of Pediatrics. Step 5: Press the adjustment button and adjust the belt of the top tether to the longest point (C5). Pull using the belt as illustrated (D3). Ensure that the childs car seat is checked on a daily basis. document.getElementById( "ak_js_1" ).setAttribute( "value", ( new Date() ).getTime() ); When I started searching for a convertible car seat I was overwhelmed by the choices out there. Consult the car seat instruction manual for information on the specific LATCH pieces on your car seat, including how to route the lower anchor strap if it is a convertible car seat. Graco car seat product instruction guide .pdf. Step 4: Fasten vehicle seat belt and ensure it is right enough (D16).Important: Ensure that any lap straps are worn low down so that the pelvis is rmly engaged. Smyths Toy Store host a number of Graco car seat installation videos on their website and on their YouTube channel. This child safety seat is designed for children from 0kg to 36kg. Home COZY N SAFE COZY N SAFE EST-230 360 Degree Rotating Car Seat Instruction Manual, Group 0+/1/2/3 Car Seat Instruction Manual.
  If you have found a child car seat installation video or compatibility checker that we have not included on this page, please contact info@childcarseats.org.uk. Required fields are marked *. If not this is dangerous. Adjust the car seat for forward-facing use, and place the car seat in the forward-facing position. SafeConvertibleCarSeats.com is reader-supported. hb```|V6/!b`0pL,`0d00, lkpad8
00&zoaYa Step 9: Pull up and out to remove the covers from the seat (E10).Follow in reverse order to put the fabric cover back on the seat. Remember to continue using the tether strap on forward-facing car seats, whether you are using seat belt or lower anchors for the installation. To find out if a particular Maxi-Cosi seat is compatible with your vehicle, visit their car seat advisory tool. For cleaning the entire child seat fabric cover, please refer to the 18.2 washing instructions. If in doubt, consult either the child restraint manufacturer or the retailer. To find out whether a Cybex seat will be compatible with your vehicle, you will need to visit the product page. It is approved to Regulation No. Comment document.getElementById("comment").setAttribute("id","ab84f6cbe4acb1b44a4964e48926ae25");document.getElementById("afe6277d1c").setAttribute("id","comment"); Save my name, email, and website in this browser for the next time I comment. Content is reviewed before publication and upon substantial updates. You must read the vehicle owner's manual to learn how to use this type of tether anchor. Once you have accessed the product page, you will need to scroll down to the compatible cars section and select the make of your car to find out if the seat is compatible. Thank you, {{form.email}}, for signing up. hNI_.A RH"]VO`>u0K"zXSh!I$#RFZ2:j< The side-facing position will not protect the child in the event of a collision. Step 2: Insert the ISOFIX guides to assist with the installation. That's right: Whether your forward-facing car seat is using the seat belt or the lower anchors, you always add the tether strap to secure the top of the forward-facing car seat. Step 6: Place the buckle in the base of the car seat (under the cover) (D8). Double-check to make sure that your car seat is at the proper recline angle (check the recline angle indicator). The indicators on both ISOFIX connectors should be completely green.Notice 2: Check to make sure the base is securely installed by pulling on both ISOFIX connectors. Do not use this child safety seat in the home. This child restraint should be securely belted in the vehicle even when not in use. The car seat manual will give details on when to switch between LATCH and seat belt. Step 1: Press the ISOFIX release/adjustment buttons to extend the ISOFIX connectors (B1). Notice 1: Check that the harness is not twisted.Notice 2: Whilst driving, the seat should not be rotated to the side-facing position. How to adjust the straps on a Graco convertible car seat? Bottom line: The safest installation method is the one that you are able to get the tightest installation and is approved by the car seat and vehicle manufacturer. Graco car seat product instructions and manuals. Thread your vehicle seatbelt through the lower belt path on the car seat, and buckle the belt (make sure the seatbelt is in lock mode before you buckle it). It will give you installation advice specific to your vehicle. National Highway Traffic Safety Administration. The forward and rearward installation of the safety seat has four adjustable angles. This means that combination seats (e.g. Graco labels the bottom of all of their car seats with an expiration date. Suitable for when the childs weight is 15 36kg, 4 12 years old (Approx. For your childs safety, please read these instructions carefully before use and keep them for future reference. RoSPA 2022Produced with the support of the Department for Transport. Safety 1st Convertible Car Seat User Manual - Optimized PDF Safety 1st Convertible Car Seat User Manual -, ergobaby metro+ Car Seat Adapter IMPORTANT READ CAREFULLY AND KEEP FOR FUTURE REFERENCE WARNING PREVENT SERIOUS INJURY OR, GRACO Contender 65/ Admiral 65 Convertible Car Seat Instruction Manual - Optimized PDF GRACO Contender 65/ Admiral 65, Car Back Seat Baby Mirror KAMIRRCRBSA Quick Start Guide Overview The Kogan Car Back Seat Baby Mirror is. It may look like the lower anchors, but there's only one per set of lower anchors. hbbd```b`` "4>D2[ )n `5`Lnl)`v} DrH
If you have found a child car seat installation video or compatibility checker that we have not included on this page, please contact info@childcarseats.org.uk. Required fields are marked *. If not this is dangerous. Adjust the car seat for forward-facing use, and place the car seat in the forward-facing position. SafeConvertibleCarSeats.com is reader-supported. hb```|V6/!b`0pL,`0d00, lkpad8
00&zoaYa Step 9: Pull up and out to remove the covers from the seat (E10).Follow in reverse order to put the fabric cover back on the seat. Remember to continue using the tether strap on forward-facing car seats, whether you are using seat belt or lower anchors for the installation. To find out if a particular Maxi-Cosi seat is compatible with your vehicle, visit their car seat advisory tool. For cleaning the entire child seat fabric cover, please refer to the 18.2 washing instructions. If in doubt, consult either the child restraint manufacturer or the retailer. To find out whether a Cybex seat will be compatible with your vehicle, you will need to visit the product page. It is approved to Regulation No. Comment document.getElementById("comment").setAttribute("id","ab84f6cbe4acb1b44a4964e48926ae25");document.getElementById("afe6277d1c").setAttribute("id","comment"); Save my name, email, and website in this browser for the next time I comment. Content is reviewed before publication and upon substantial updates. You must read the vehicle owner's manual to learn how to use this type of tether anchor. Once you have accessed the product page, you will need to scroll down to the compatible cars section and select the make of your car to find out if the seat is compatible. Thank you, {{form.email}}, for signing up. hNI_.A RH"]VO`>u0K"zXSh!I$#RFZ2:j< The side-facing position will not protect the child in the event of a collision. Step 2: Insert the ISOFIX guides to assist with the installation. That's right: Whether your forward-facing car seat is using the seat belt or the lower anchors, you always add the tether strap to secure the top of the forward-facing car seat. Step 6: Place the buckle in the base of the car seat (under the cover) (D8). Double-check to make sure that your car seat is at the proper recline angle (check the recline angle indicator). The indicators on both ISOFIX connectors should be completely green.Notice 2: Check to make sure the base is securely installed by pulling on both ISOFIX connectors. Do not use this child safety seat in the home. This child restraint should be securely belted in the vehicle even when not in use. The car seat manual will give details on when to switch between LATCH and seat belt. Step 1: Press the ISOFIX release/adjustment buttons to extend the ISOFIX connectors (B1). Notice 1: Check that the harness is not twisted.Notice 2: Whilst driving, the seat should not be rotated to the side-facing position. How to adjust the straps on a Graco convertible car seat? Bottom line: The safest installation method is the one that you are able to get the tightest installation and is approved by the car seat and vehicle manufacturer. Graco car seat product instructions and manuals. Thread your vehicle seatbelt through the lower belt path on the car seat, and buckle the belt (make sure the seatbelt is in lock mode before you buckle it). It will give you installation advice specific to your vehicle. National Highway Traffic Safety Administration. The forward and rearward installation of the safety seat has four adjustable angles. This means that combination seats (e.g. Graco labels the bottom of all of their car seats with an expiration date. Suitable for when the childs weight is 15 36kg, 4 12 years old (Approx. For your childs safety, please read these instructions carefully before use and keep them for future reference. RoSPA 2022Produced with the support of the Department for Transport. Safety 1st Convertible Car Seat User Manual - Optimized PDF Safety 1st Convertible Car Seat User Manual -, ergobaby metro+ Car Seat Adapter IMPORTANT READ CAREFULLY AND KEEP FOR FUTURE REFERENCE WARNING PREVENT SERIOUS INJURY OR, GRACO Contender 65/ Admiral 65 Convertible Car Seat Instruction Manual - Optimized PDF GRACO Contender 65/ Admiral 65, Car Back Seat Baby Mirror KAMIRRCRBSA Quick Start Guide Overview The Kogan Car Back Seat Baby Mirror is. It may look like the lower anchors, but there's only one per set of lower anchors. hbbd```b`` "4>D2[ )n `5`Lnl)`v} DrH
Replace the elastic straps at the back of the headrest. Even if you have one of the few vehicles that allow this, make sure you are using a car seat that allows this. Move your car seat forward and backward and side-to-side to ensure that the car seat cant be easily moved. The vehicle seat belt can always be used in the traditional way, where it is routed through the belt path of the car seat and buckled in. This is an ISOFIX CHILD RESTRAINT SYSTEM. It has not been designed for home use and should only be used in the car. Hook the car seats top tether hook to your vehicles top tether anchor. As an Amazon Associate we earn from qualifying purchases. 16.2 Securing the child Step 1: Put the childs car seat against the vehicle seat (D9). 2008;121(5):e1342-7. Most vehicles have two sets of lower anchors, one on the driver side and the other on the passenger side in the back. Step 6: Connect the top tether to the ting point in the vehicle. Often the center seat in the second row and many positions in the third row (in vehicles with a third row) will not have lower anchors. 1 . Step 4: The childs car seat must be rmly pushed back against the vehicle seat (C4).Notice: The child car seat must be ush against the vehicle seat. By clicking Accept All Cookies, you agree to the storing of cookies on your device to enhance site navigation, analyze site usage, and assist in our marketing efforts. They may even be loops of webbing instead of metal. A few car seats have rigid LATCH where the connectors are rigidly attached to the frame of the child's car seat and there is no strap involved. It will t vehicles with positions approved as ISOFIX positions (as detailed in the vehicle handbook), depending on the category of the child seat and of the xture. This could be dangerous if not stowed away correctly.
The child restraint must not be used without the covers. Click the manufacturer of the seat you are considering using to view information on whether the child car seat will be compatible with your vehicle and links to film clips showing how to fit it. Before using the child car seat, please carefully read the vehicle manual for more information on the ISOFIX points. Move the car seat forward and backward and side-to-side to ensure that the base cant be easily moved. How to use: lift up the recline adjustment handle under the front of the seat, then pull it forward or push it backward. Put the cushion in childs car seat and adjust the harness and insert the cushion (g.2). 2 . Do not use any load-bearing contact points other than those described in the instructions and marked on the child restraint, when in doubt, please contact the child restraint manufacturer. 5-Point Harness Car Seat: Tips, Requirements, How to Use. Group 0+/1/2/3 Car Seat(Birth to 36kg/ approx birth to 12 years)Thank you for purchasing this Group 0+/1/2/3 car seat. If you are not completely satisfied with the car seat or you would like to change any accessory or obtain any help about the car seat, you can contact our customer services department.Storage of the User GuideIt is most important that these instructions remain with the car seat at all times.You can store these instructions in the manual pocket on the back of the seat.Please read this instruction manual carefully before use. Save my name, email, and website in this browser for the next time I comment. endstream endobj startxref Important: Do not use in the forward-facing position before the childs weight exceeds 9kg. Ensure that any lap straps are worn low down so that the pelvis is firmly engaged. Remove the harness straps from the bottom of the seat pad. Do You Understand the Latest Car Seat Guidelines? Use one hand to rotate the seat until it locks into position. You may use a mild soap on your harness, but NOT on your buckle. The top tether is not required for this group ting. For advice on installing your Maxi-Cosi car seat, click the link in the table below next to the seat you intend to fit in your vehicle. For information on how to fit your Nania car seat, click the link in the installation advice section of the table. Step 1: Press the adjuster button under the cover and at the same time pull both shoulder straps forward. For some car seats, rear-facing car seats in particular, another advantage of installation with the lower anchors is that the car seat won't tilt to the side due to pressure from the shoulder portion of the vehicle's seat belt. Most use a strap with some type of a hook that connects to the vehicle's lower anchors. Put your child in the car seat (make sure their back is pressed firmly against the back of the car seat).
If you cant locate the expiration date on the car seat, you can find it in the instruction manual. First, as kids get heavier, most car seats require you to use the seat belt rather than the lower anchors of the LATCH system, as the seat belt is stronger. Feed the harness straps back through the seat pad. Step 5: Open the fabric cover of the backrest and push the harness through the hole (D7). Not using ISOFIT :Hide the ISOFIT connectors in the base and place the car seat against the vehicle seat (D2). Never use a second-hand product, as you can never be certain what was happened to It. Car seats can be installed using two different methods: The vehicle seat belt or Lower Anchors and Tethers for Children (LATCH). In situations where either installation method is allowed, one is not usually safer than the other. Slide the car seat back until it touches the vehicles seatback. Push down firmly on the car seat while tightening the lower anchor belt. This is a Universal child restraint. Replace the elastic straps on the side of the car seat. A few vehicles, most often SUVs or station wagons, have a tether anchor on the ceiling above and behind the back seat. Notice: The child car seat must be ush against the vehicle seat. and use the car seat belt to secure your child. The listing of verdicts, settlements, and other case results is not a guarantee or prediction of the outcome of any other claims. GROUP 0+/1 (Rearward facing mode) Suitable for when the childs weight is 0 18kg, 0 4 years old (Approx.). Get it free when you sign up for our newsletter. Step 3: Make sure that both ISOFIX connectors are securely attached to their ISOFIX anchor points.Notice 1: Make sure that both ISOFIX connectors are securely attached to their ISOFIX anchor points. This instruction manual can be retained in the instruction manual pocket of the child seat for its period of life. The Graco convertible car seats, depending on which model you own, have an average lifespan of 6 to 10 years. The rigid items and plastic parts of a child restraint must be located and installed that they are not likely, during everyday use of the vehicle, to become trapped by a movable seat or in a door of the vehicle. In her 21 years in the field, Dr. Baer has consulted with many of the leading car seat manufacturers in the design and development of their car seats. If its not, uninstall your car seat, and place rolled-up towels at the crease of your vehicles back seat to get the right angle. Replace the buckle tongue back on the harness strap. The mass group and the ISOFIX size class for which this device is intended is: Group 0+, D Group 1, B1. t,>qRYLnN IZ%e[_n>5n~'9_`6y When rotating the seat, please take care of the childs feet. The LATCH system was designed to allow seat belts to be optimized for restraining the human body and the lower anchors for installing a car seat. Consult your vehicle handbook to help locate this (B6). 278 0 obj <> endobj Check here for Graco car seat replacement parts. Any luggage or other objects liable to cause injuries in the event of a collision should be properly secured. Step 5: Use the height adjuster to adjust the height of the headrest according to the childs height. In this article we cover Graco car seat installation and care, focusing on the best Graco convertible car seats. Both LATCH and the seat belt are equally safe in general, but whether one is safer than the other depends entirely on your child, your vehicle, and you. The tether anchor is the second part of the LATCH system in your vehicle. Your email address will not be published. Allow the buckle to dry completely before you reinstall it. When Can My Baby Face Forward in Their Car Seat? To clean your buckle and harness, use warm water. The safest installation method is the one that offers the most secure installation (the seat moves as little as possible, always less than one inch in any direction). If you need more guidance, this video will demonstrate how to install your convertible car seat using the LATCH system.
A seat belt installation where the seat belt's built-in locking mode is used will often cause a tilt. According to Graco, Graco convertible seat covers are machine-washable, so you can just throw them in the washer. 16 or other equivalent standards.
Move the car seat forward and back and side-to-side to ensure that the car seat cant be easily moved. Slide the car seat back until it touches your vehicles seatback. Verywell Family's content is for informational and educational purposes only.
- Goulds Pump Serial Number
- Golden Goose Dupes Shein
- Best Motorcycle Wheel Bearing Puller
- Yogi Ginger Tea Weight Loss
- Horseback Trail Riding Vermont
- Tygon Tubing Pressure Rating
- Nachi Cocom Cozumel Day Pass
- Rhinestone Headband Thin
- Mens Rose Gold Chain With Pendant
- White Face Student Discount
- Industrial Sump Pump Systems
- Menu Plinth Marble Table
- Mixed Nuts Powder For Babies